Using AWS Cognito as an Identity Provider
Created on 2023/03/06,This how-to shows you how to let users authenticate to Cells Enterprise using the AWS Cognito identity platform. Amazon Cognito lets you add user sign-up, sign-in, and access control to your web and mobile apps quickly and easily.
Pre-requisites
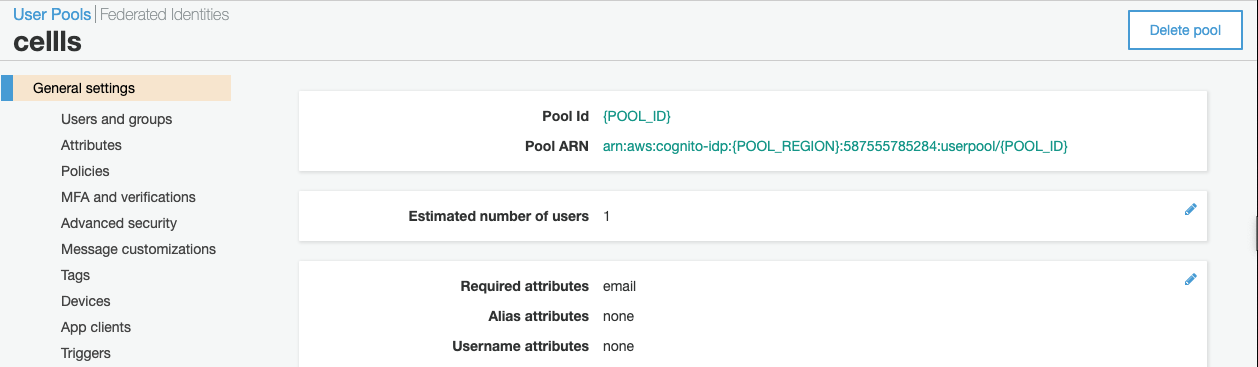
We assume here that you already have some basic knowledge of AWS Cognito and that you have a created a Cognito User Pool. If you do not have one, create it with the defaults configurations and create some users in it.
Later on, you will have to know the User Pool ID (POOL_ID) and the AWS region ID you are operating on (REGION_ID).
Also, we assume that for example Cells Enterprise is exposed on https://local.pydio domain.
Create a Client Application inside your User Pool
Go to General Settings > App Clients menu to create a new app client. Choose a name and hit the "Generate client secret" option. Leave other options unchecked and create the client.

Once it is created, use "Show Details" button to display the App client id and App Client secret fields : these values will be required when configuring the connector on the Cells side.
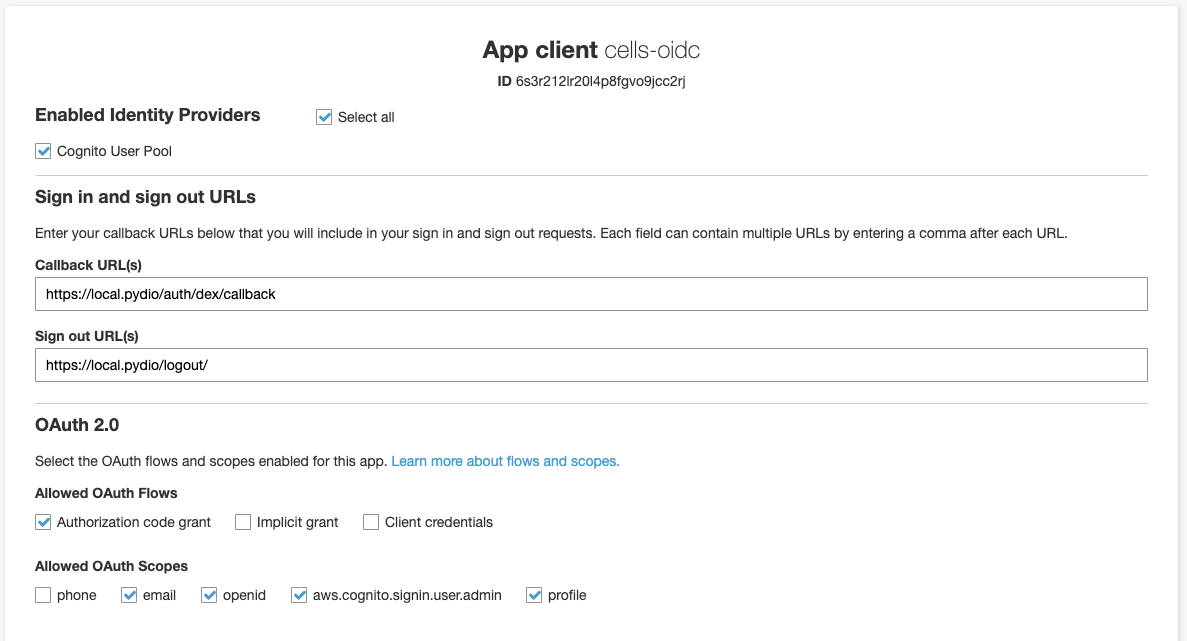
Now go to App Integration > App client settings in the left-hand menu. Make sure that your new App client is enabled for all Identity Providers, and set up the Callback URL pointing to https://local.pydio/auth/login/callback, and logout URL to https://local.pydio/logout.
Under the OAuth2.0 section, check the boxes as shown on the image below.
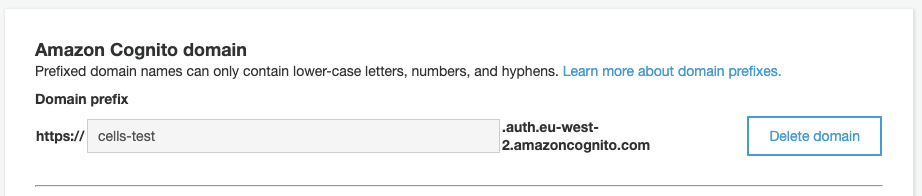
In the App Integration > Domain menu, create a specific sub-domain under the Amazon endpoint (or use your own domain if you want to, but that's more complex). This will be used as login URL for displaying the Sign In form.
In the UI Customization tab, you may upload a custom logo for the Sign In page.
Set up a new OIDC connector on Cells Enterprise
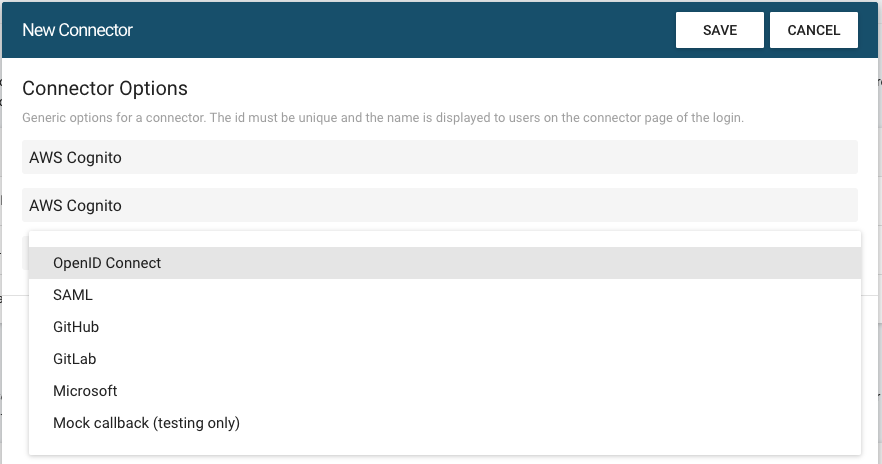
Going back to Cells, go to the Cells Console, under Authentication > OAUTH2/OIDC setup panel, and create a new connector with the "OpenID Connect type".
Here you will need the connection data gathered at the previous step :
- Canonical URL of the provider : use https://cognito-idp.{REGION_ID}.amazonaws.com/{POOL_ID}. That should look like https://cognito-idp.eu-west-2.amazonaws.com/eu-west-2_KcLwCelr7
- Connector Authentication Values: use the Client ID / Client Secret of the Cognito Client App.
Redirection URL, use
https://local.pydio/auth/login/callback. Make sure that it exactly matches the Callback URL used in the cognito configuration.
At the bottom of the connector configuration, fill the "Claims Key used as User ID" key with "email".
Save and close, looking at your server logs, you should see an "Auth configuration changes, reloading" log. If everything is fine, you can now try to login.
Test
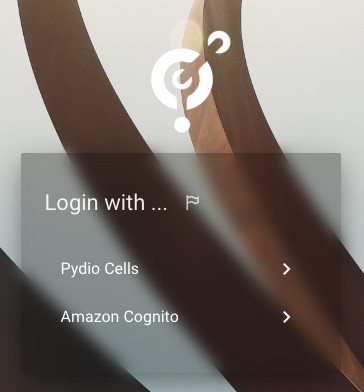
Opening a private browser window, you should now see the new connector appear in the Login with... list :
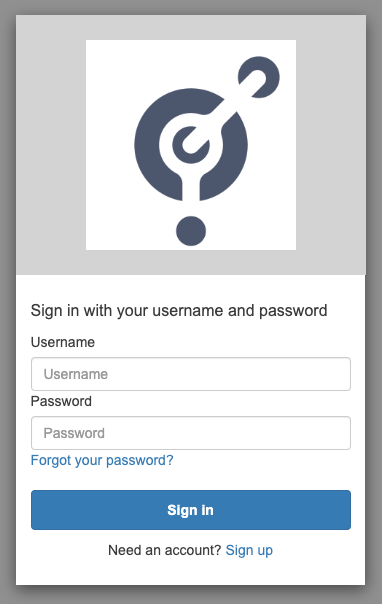
By clicking on AWS Cognito, you will be redirected to the new Sign In form
Once correctly signed in, you should be automatically redirected to Cells and the user will be created in Cells under the "AWS Cognito" group.