Using the tasks scheduler
Created on 2023/03/06,Category:
WARNING
This article is for Pydio 8 (PHP). Time to move to Pydio Cells!
HOW TO USE THE SCHEDULER
With Pydio you can schedule tasks and gain a lot of time instead of running every task indivudaly you can run them all at a chosen time such as maintenance tasks.
First make sure you have the Tasks Scheduler Plugin Enabled go to Available Plugins > Actions Plugins.
PROGRAMMING TASKS
Now lets see how you can program & run a task i will give you an example but you can apply the logic for other tasks.
Go to Menu > Scheduler and click on create a new task.
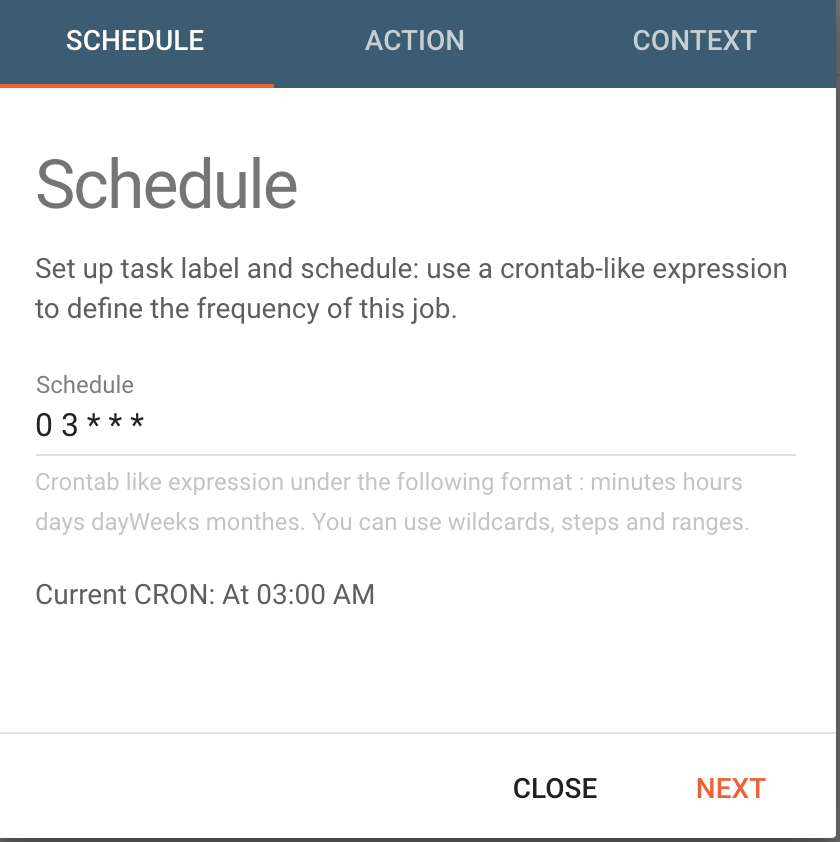
SCHEDULE TAB
- Schedule : you need to use a cron expression, to set the time for when the tasks are going to be executed.
for example : 0 0 0/1 1/1 * ? * ( i want to send mails every HOUR )
Here's a Cron Expressions Generator theres plenty on the internet
ACTION TAB

- Action : Choose the action that you want to perform.
for example : consume_mail_queue ( it will send all the mails that i queued in one batch )
- Action Parameters : Your action parameters, specify what you exactly need from the chosen action.
- Label : Name your Task, I advise you to always give it a clear name.
for example : i'm creating a task that will send a notification mail lets name it should be [NOTIF]mail, it will make it easier to find when i want to change something.
Its just an example feel free to name it as you want.
CONTEXT TAB
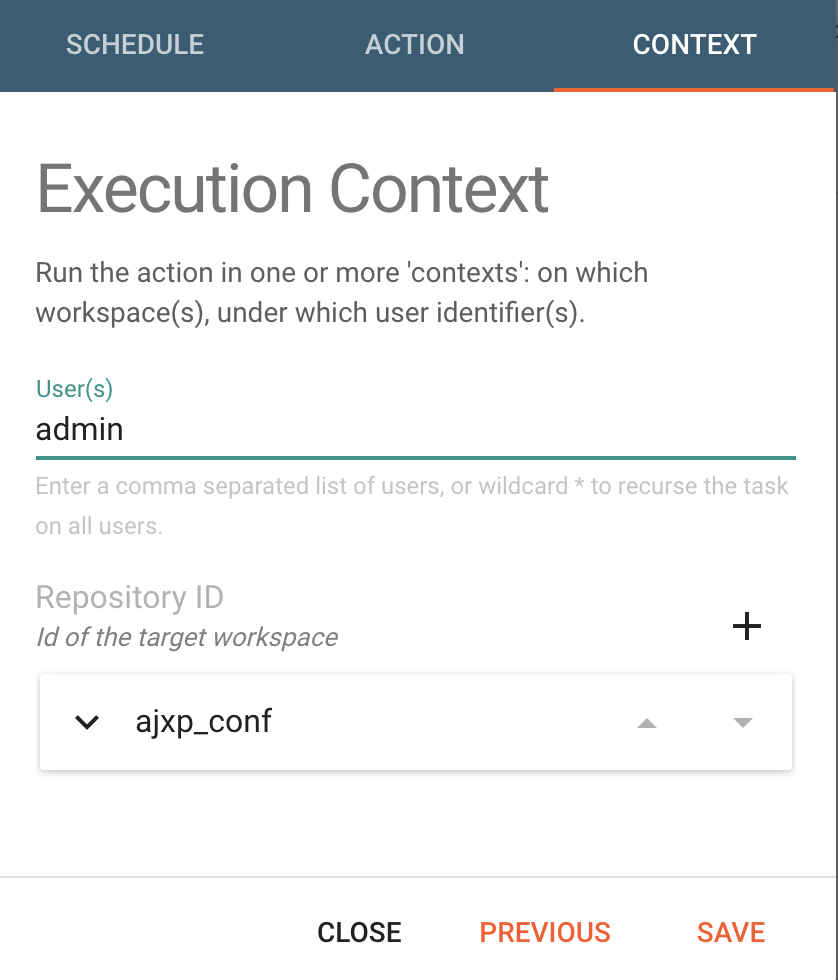
- User(s) : The user that is identifying the task.
- Repository ID : The workspace that you're targeting with the task, you can choose all the workspaces if you wish to. You can add multiple single workspaces if you want to be more precise.