Install Pydio Booster Automatically
Installing Binary
The Enterprise Distribution provides a dedicated in-app mechanism to download the last version of Pydio Booster for your OS, run it and monitor if it is working properly. Along with the default configuration, this tool should generally be sufficient to have Pydio Booster up and running easily. However, if your networking setup is involving proxies, internal / external URL's or multiple-nodes, you may need to customize the configuration. You can even fully customize the generated configuration file and start Pydio Booster manually.
In the administrator panel, look for Pydio Booster in the left-hand menu, and scroll to the "INSTALL / CHECK FOR UPDATE" button. This dialog should first detect your server operating system. Please make sure it is correct, the 64bits / 32bits is not always accurate, as this valeur reflects your PHP architecture, not your real architecture. For example, if you a running a PHP5.X version on Windows, PHP will probably report 32bits whereas your server is 64bits. Select the latter value for Pydio Booster in that case.
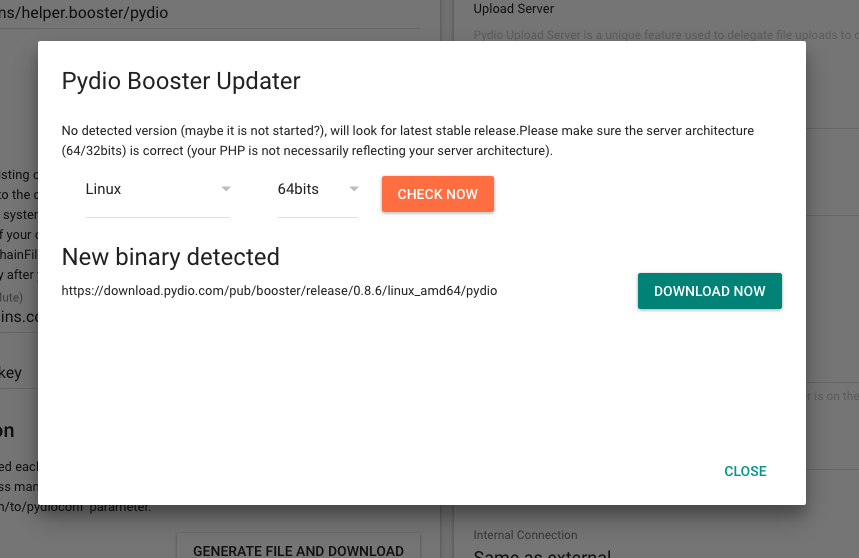
The tool should detect the last available version: you can from there download it and run it.
Configure and start
After install, you should already see some changes in the "monitoring" panel. By default, most important features (web socket, upload) are not checked, so you will have to quickly review the configuration panel and reload the Booster.
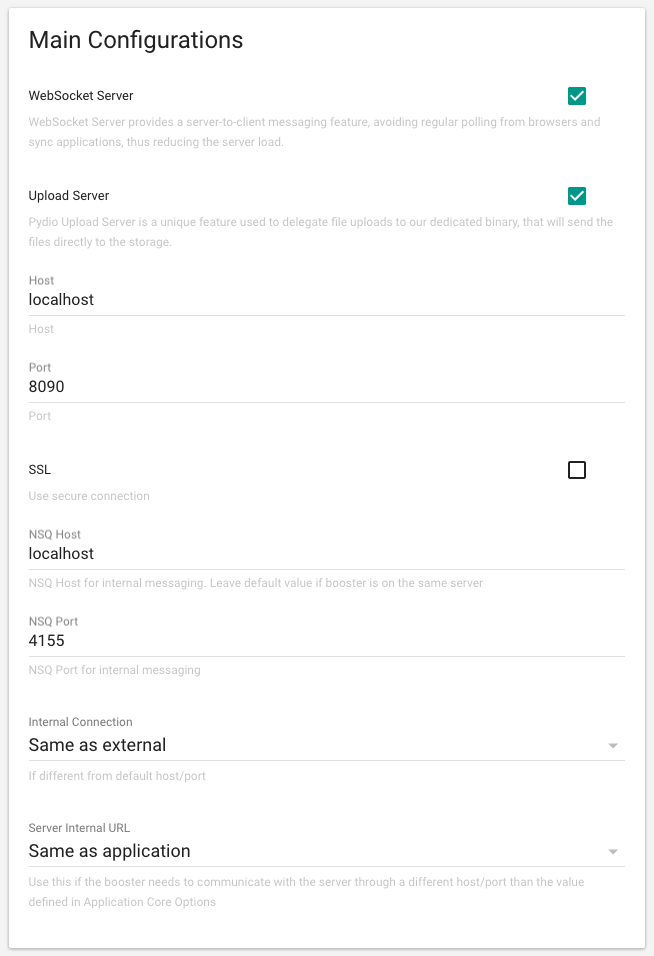
- The most important field here is the "Host": it should be the same as your Pydio server domain. If pydio is available at https://yourdomain.tld/pydio , the Booster Host should be yourdomain.tld as well.
- If you are serving Pydio through https (which is recommended), you can check the "SSL" box and in that case you will have to point to the domain SSL key/certificates as configured in your virtual host.
- Check the "WebSocket Server" and "Upload Server" to enable the features.
- The default port for Pydio Booster is 8090. Make sure that it is open for TCP connection in your firewall (or select your own port value).
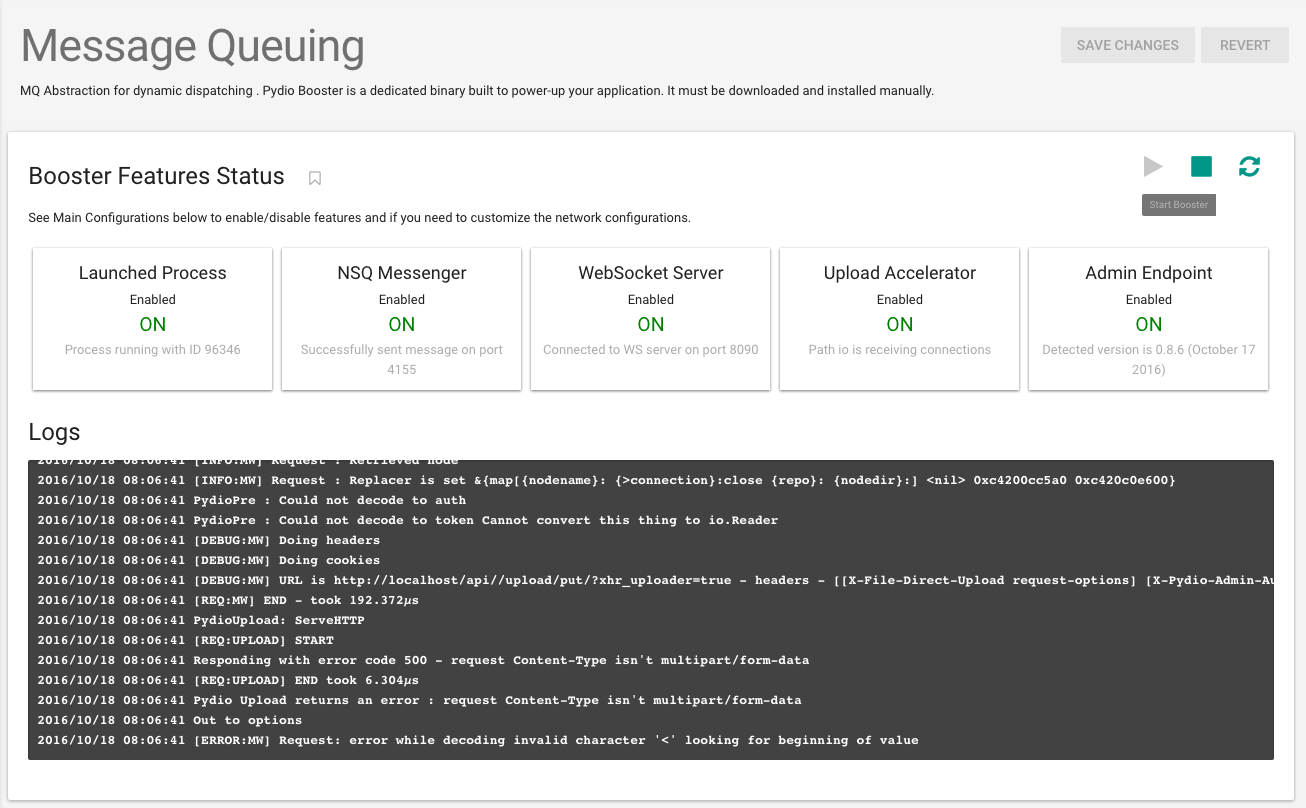
If you make any changes, hit the SAVE button, and when you scroll back to top, you should see an alert telling you that you need to reload the tool.

Click on Reload Pydio Booster (or on the reload icon button in the top right), wait for a couple of seconds to see if all lights turn to green.
Monitoring Booster status
The administration panel tries to perform various connections to the Booster server to check if features are working correctly.
To make 100% sure everything is ok, the simplest is to use the "Developer Tools" of your preferred browser (best is Chrome for that), open the "Network" panel, and switch to a Pydio workspace. Hit the browser reload button, and check that you don't see any "WebSocket Connection closed error". Looking under Network > WS you should be able to see that a connection is open, and that it receives "frames" when you do any action on the files.

If you enabled file upload, you should see in the Network > XHR panel some POST request going to the alternative (8090 by default) port defined for Pydio Booster.
Troubleshooting
For more advanced configurations and troubleshooting, make sure to read the dedicated articles in the Knowledge Base.
Back to top