Customizing User Interface
As part of the Enterprise Distribution, Pydio Branding Tool gives you an extremely simple way of pushing your brand identity to your collaborators, by customizing interface colors and logos.
Interface Logos & Backgrounds
Use the Admin Dashboard > User Features > Appearance panel to update your own brand images.
For background, make sure to use high resolution images, but save them as JPG to avoid loading huge images. Stick to a size inferior to 2MB, which should be sufficient for definition.
Enable the branding tool:
First of all, you need to enable the branding tool. To do so, please go to the administration dashboard, then to Users Features > Appearance.
In the Main Options tab, make sure it's set like that:
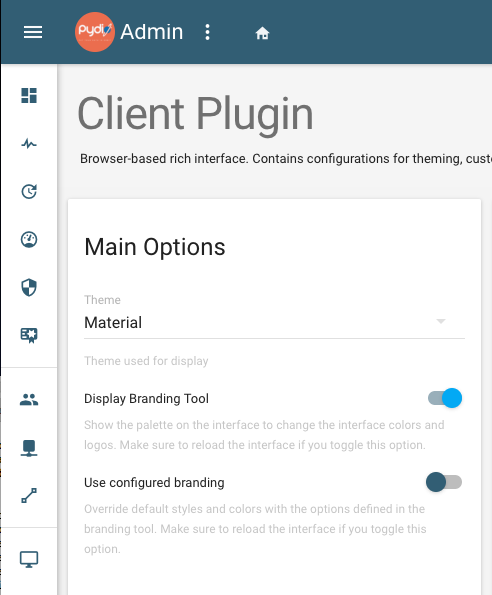
Make sure to save changes, go to any workspace on your Pydio server, then refresh the page.
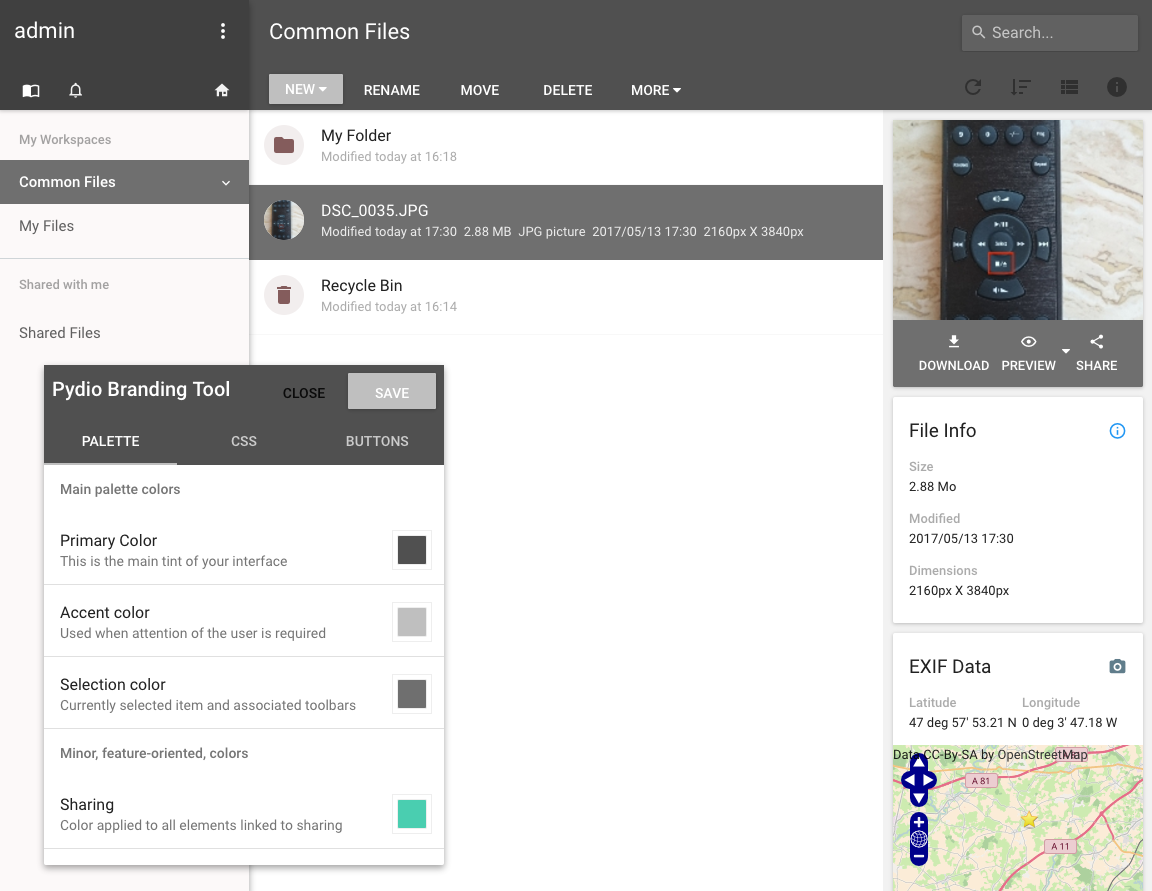
You should see the branding tool showing up:
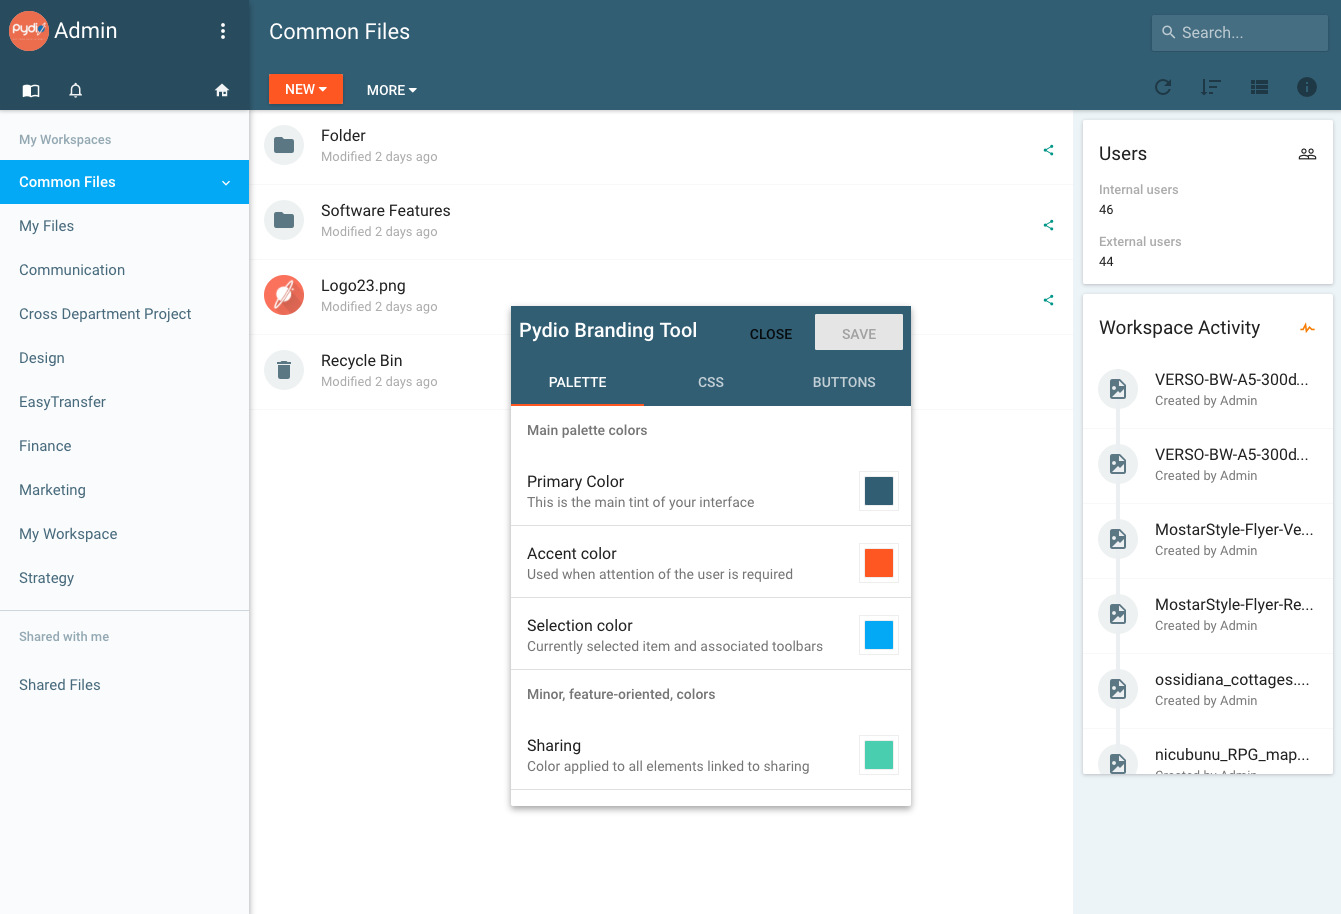
Change interface's colors:
This tool allows you to change every colors on the interface.
The color palette is organized as follow :
- Primary Color : this is the main color of the header part. Currently the typo color is always expected to be white, so make sure to stick to a "dark" color. This color will be declined into many variants for other zones in the UI.
- Accent Color : used to draw attention of your users on some specific actions, this color should be flashy. Text is white as well.
Selection Color: used to identify the currently selected files or folders. When changing, if it is not updated directly, try to simply click on a different file to see it refreshed.
Sharing Features : sharing-related features (like sharing dialog, share icon, etc) are using this color as their main tint.
- Avatars: Users avatars, e.g. in address book or share lists, are using this color.
Try to change the colors to see how it affects the various parts of the UI. The color picker gives you a quick access to the Google Material main palette. We recommend sticking to this palette if you can, but of course, nothing is mandatory!
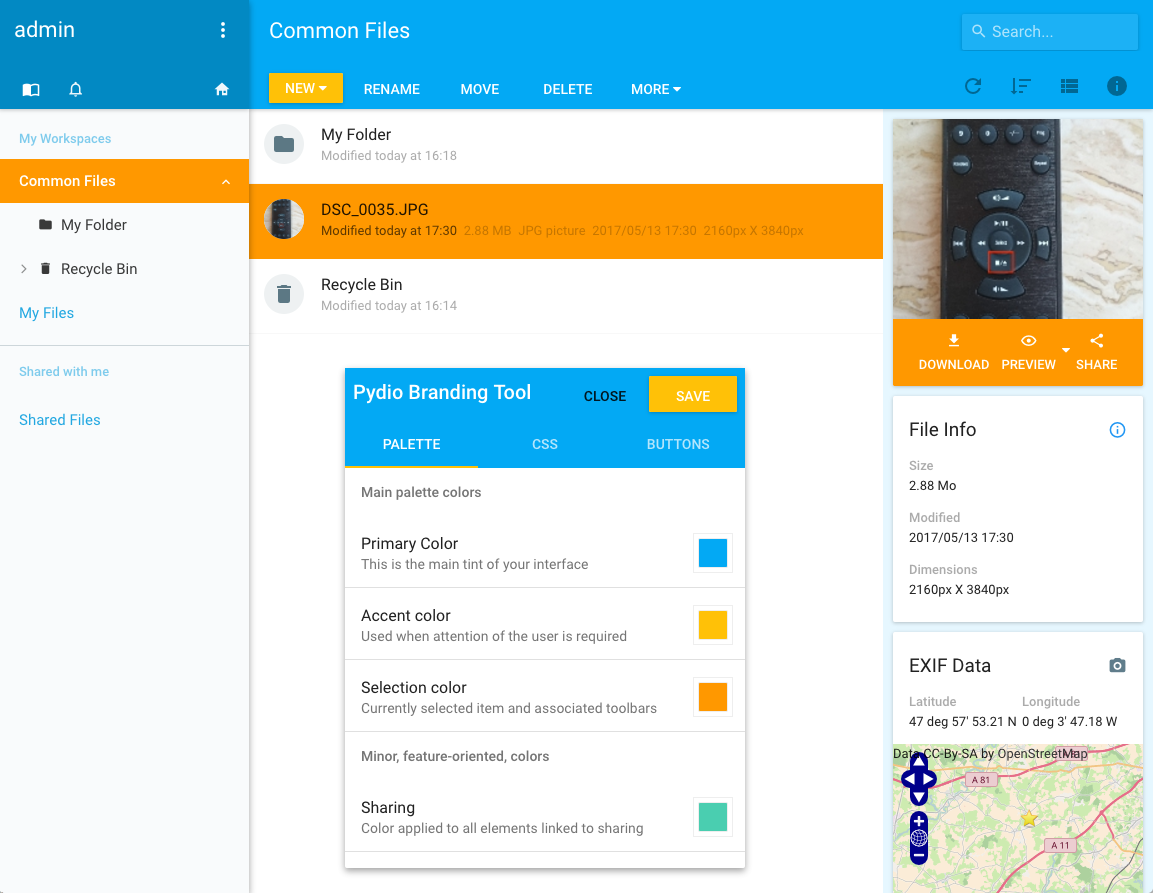
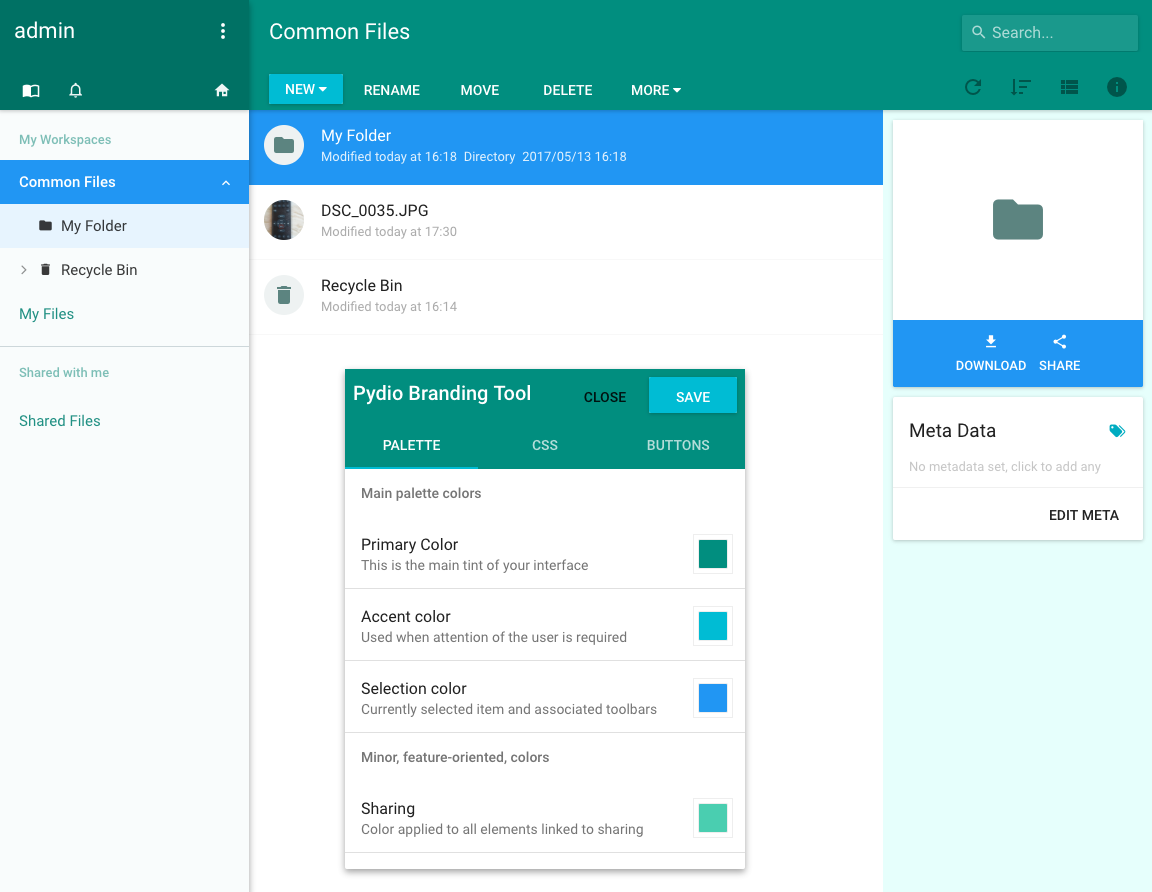
Here are a couple of samples generated with the branding tool :
Google Colors
Healthcare Green
Black & White
Custom CSS
If our tool is not sufficient for your needs, you can use the "Custom CSS" tab to add your custom CSS Rules directly to the page.
This requires a technical knowledge of CSS Style Sheets.
Add buttons to interface:
Pydio Branding Tool also allows you to add one or many button to the interface. This can be typically handy if you want to position a "Back To Home" button somewhere that would point to a specific page of your website or intranet. Or to trigger a custom javascript or network call for e.g. disconnecting from a custom authentication backend.
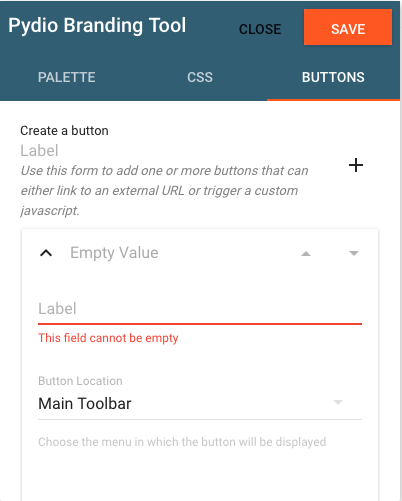
Here are the settings for a button:
- Button Label
- Button Location (the part where you want your button to be displayed). The list will display some specific toolbars, plus any toolbars declared in the application.
- Main Toolbar: toolbar heading the files list
- New... button menu : menu opened by clicking on the "New" button
- Display Options Bar : right-hand icons used for display options
- Left Panel Widget: Top left user cartouche, toolbar where the "address book" and "alerts" are displayed
- Left Panel User Menu: Top left user cartouche, menu opens when clicking on the vertical dots.
- Button Icon: icons are listed from the ones available as web fonts in the page, from both the Font Awesome and Material Design Icons library. Refer to these libraries.
- Button Behaviour: choose between
- Button Link (paste the url of your webpage)
- Link target (in the current page or in a new tab)
- Write your own javascript code been called by clicking on the button
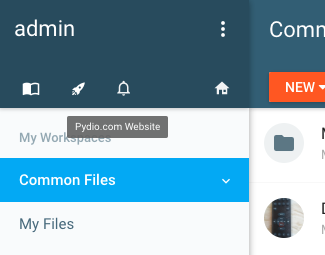
For example, the button below is using the Material 'rocket' icon, with label "Pydio.com Website", located in the "Left Panel Widget" toolbar.
Save settings:
Once you are ready, click on the "Save" button then "Close". It will change the settings to hide the branding tool, and use the branding data you have just configured. If you want to disable this branding and see the original colors, just go to the User Features > Appearance and toggle the settings here.
Back to top