Enabling SSO with a php-based CMS (Dupral, Joomla!, Wordpress, your own)
Pydio provides a set of “CMS Bridges” to allow you to use your existing CMS as a users directory. The principle of the bridge is that Pydio becomes a “Slave” of the CMS, in that when a user logs in the CMS, she is automatically logged in Pydio also. If not logged and accessing to Pydio, she is automatically redirected to the CMS login page.
Disclaimer : If you installed Pydio-Enterprise with the linux repository (apt, yum etc...), you must install the "pydio-plugin-auth.remote" package and don't forget to refresh your pydio after that.
Then, you can go in "All plugins" > Available Plugins > Authentification Backends and activate the "Remote authentification".
Supported CMS are currently PHP-based : WordPress, Joomla! and Drupal. There is also a “blank” implementation that should allow you to plug to your own CMS. For the first three, you will have to install a dedicated “plugin” or “module” (depending on the CMS) to make the connexion effective. See the dedicated page Extensions > Bridges for more info about versions supported and download links.
Install the dedicated plugin in the CMS
Download the Pydio-CMS-Bridges package from the dedicated page, and unzip it on your local computer. Locate the correct plugin from the content of the folder
- WordPress: all WordPress version
- Joomla!
- 1.5: Joomla! 1.5 only
- 1.6: Joomla! 1.6 to 2.5 included
- 3.0: Joomla! 3.0 and upper
- Drupal
- 6.X: Drupal 6.X
- 7.X: Drupal 7.X
Deploy the plugin to your CMS, using their specific procedure. Activate and configure the plugin using the following parameters:
- Pydio Installation Path: full path of Pydio on the server. Must be absolute, e.g. /var/www/pydio, or /home/mylogin/public_html/pydio, etc
- Secret Key: this is a secret key that you set up on both sides (pydio and the CMS) to make sure they recognize each other.
- Create Users: generally set to yes, this means that at login, if the user is not already in the Pydio base, it will be created automatically. See also the Readmes & How-Tos contained in the Bridges package to get more specific instruction for your CMS of choice.
Switch Authentication to Remote
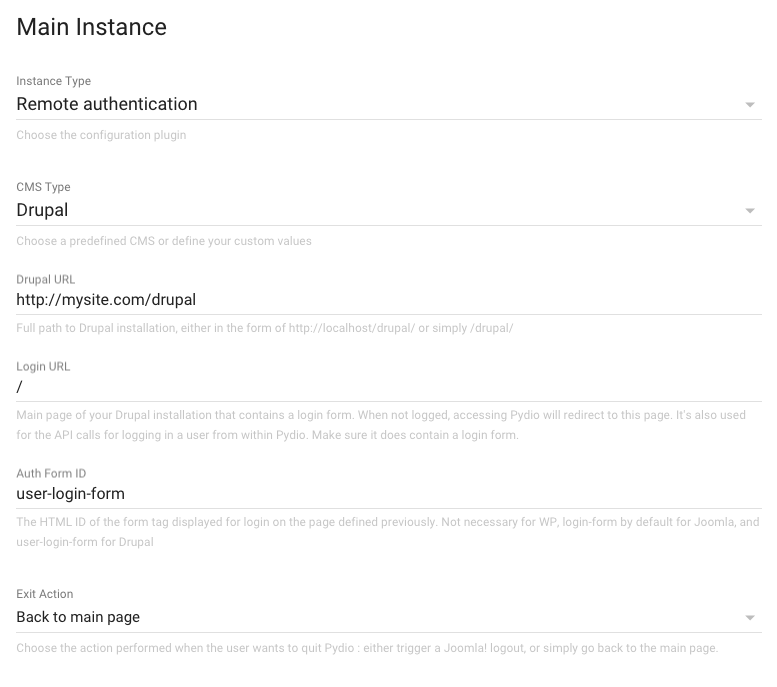
In the Settings panel, under Application Parameters > Authentication, switch the Master Driver to the “auth.remote” driver. Here you will have to define a couple of URLs and parameters to make the plugin function properly.
The Authentication must work in two ways : when successfully logging in from the CMS, we will hook into Pydio and force the user to be logged in as well. But when using other clients like the mobile devices clients, we will need to perform the authentication directly in Pydio, and interrogate the remote CMS directory by some kind of API.
- Main URL: must be either an complete URL (like http://localhost/drupal/, or http://192.168.0.23/, etc), or a URI starting from the root of the webserver (like “/drupal/” or “/”, in that case the host will be automatically detected). It is pointing to the root of the CMS installation.
- Login URL: a page of the CMS in which a user login form is displayed. It will be used for both redirecting a non-logged user trying to access Pydio, and for programmatically interrogating the CMS for authentication. Thus it MUST contain a login form. Generally, the home page would be ok, thus the value “/”
- Auth Form ID: this is linked to the previous field : the HTML ID of the login form displayed inside the login page. When logging programmatically, we fake the CMS by automatically posting this form with the user’s credential. Default values are provided by default, but you must make sure this is correct. Not necessary for WordPress.
- Exit Action: whether to directly logout or simply go back to main page with the “Back” Pydio action. Not available in Joomla!, the logout is not a simple operation (two-steps post).
- Secret Key: the same key as defined in the the corresponding module. Remote Authentication Parameters