Enabling quotas
The meta.quota plugin
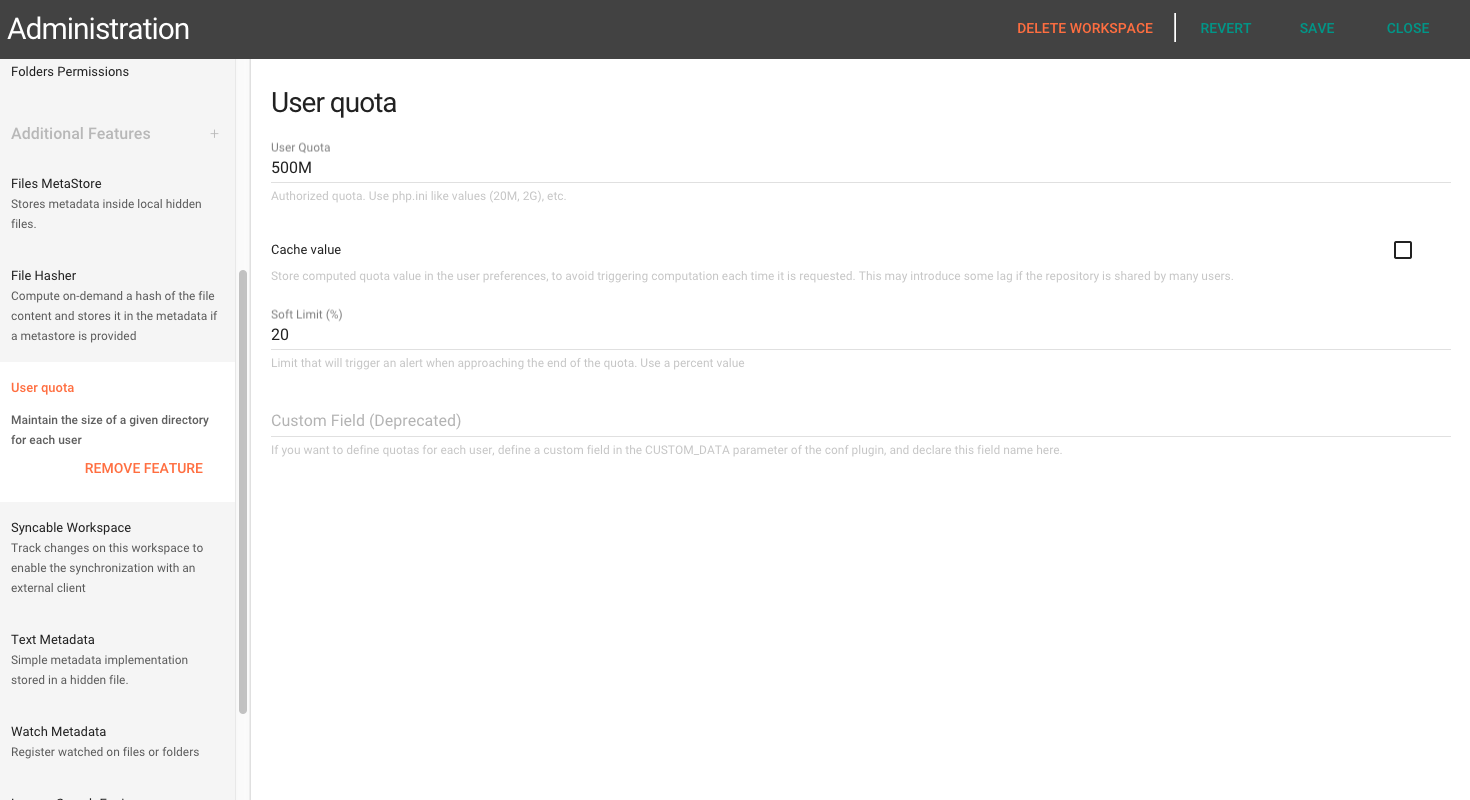
If you need to enable some storage limitations for your users, the meta.quota plugin can be added as a workspace feature. To add it to workspaces go to Workspaces & Users > Workspaces > Choose a workspace and edit it and add the User Quota Feature.
This will allow the following behaviors:
- Limit storage usage on a per-workspace basis or on a global basis (this is configured via the plugin global options), e.g. "50M for a given workspace", or "50M for all cumulated workspaces a user can access".
- Define a maximum quota value as well as a soft limit triggering an alert (will send an email to the user).
- Use the roles-defined parameters to finely override the quota values on a per-group or per-user basis.
See the meta.quota plugin documentation for detailed parameters instruction.
Sample use cases
Users have access to 2 workspaces, one Personal (user-specific) and one Common (all users can access it). For most of them, we want to limit their personal space to 200M, and the overall usage of the common space to 1G.
Simply add the meta.quota feature to both workspaces.
- In the Personal workspace, set the Default Quota to 200M (the value accept php.ini-like format, with K, M, G, etc).
- In the Common workspace, set the Default Quota to 1G
A small subset of users, gathered in a group "SuperPowers" can have their personal space extended to 500M.
- Edit the SuperPowers group (right-click and "Edit"), go to the "Parameters" tab
- Using the selectors, add a parameter for
- Plugin Identifier : meta.quota
- Parameter Name : DEFAULT_QUOTA
- Repository Scope : My Files (the personal workspace name)
- Set the parameter value to 500M and Save the group.
That's it! Now if you log like a user of this group, you should see that your quota value is extended to 500M. This could have been done at the user level (Parameters tab of the user editor), the group level (like here), or the Role level (all users with this role would have this new value applied).
If you are at loss with this mechanism, you should probably read the "Users Management" section, where you will learn about parameters refinement based on Roles.
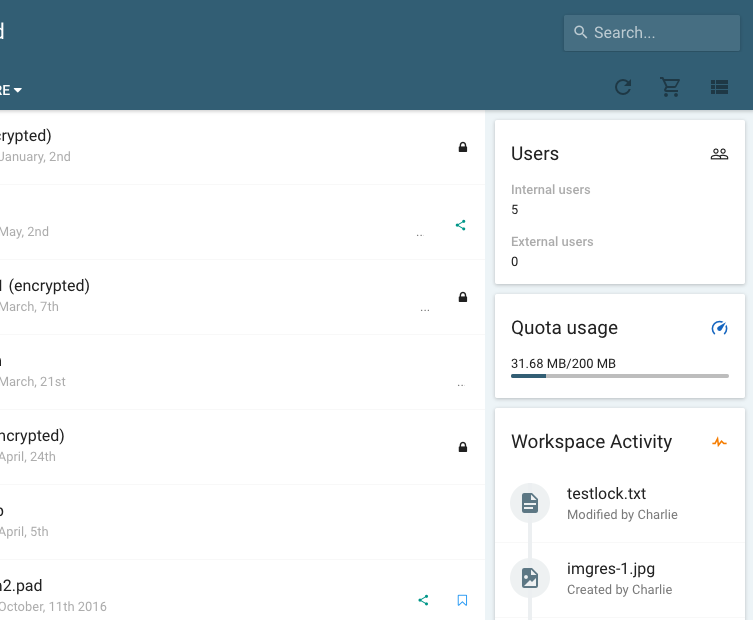
User interface
Once enable, the quota will appear in the right-hand info panel of the users, when they first enter a workspace, as shown on the screenshot below.